
In this blog post, I’ll guide you through the process of setting up a DHCP server on your Synology NAS within a subnet created on a UniFi Dream Machine Special Edition (UDM SE).
Prerequisites
Before we start, ensure you have the following:
- UDM SE: UniFi Dream Machine Special Edition.
- Synology NAS: Network Attached Storage device from Synology.
- Raspberry Pi: Any model will suffice.
- Ethernet cables: To connect your devices.
Step-by-Step Guide
1. Create a Subnet on UDM SE
-
Log in to your UniFi Router: Access your UDM SE via the UniFi Network application.
-
Create a New VLAN:
- Go to Settings > Networks > Create New Network.
- Name your network (e.g.,
VLAN101). - Set the VLAN ID (e.g.,
101). - Set the Gateway/Subnet to
192.168.101.1/24. - Set DHCP Mode to
None.
-
Assign Ports to VLAN:
- Go to Settings > Ports.
- Assign Port 2 and Port 7 to the newly created VLAN
101. (example)

2. Configure Static IP on Synology NAS
-
Connect Your NAS:
- Plug your Synology NAS into Port 7 of your UDM SE.
-
Log in to Your Synology NAS:
- Open a web browser and log in to the Synology DSM interface.
-
Install DHCP Server Application:
- Go to Package Center.
- Search for and install the DHCP Server application.
-
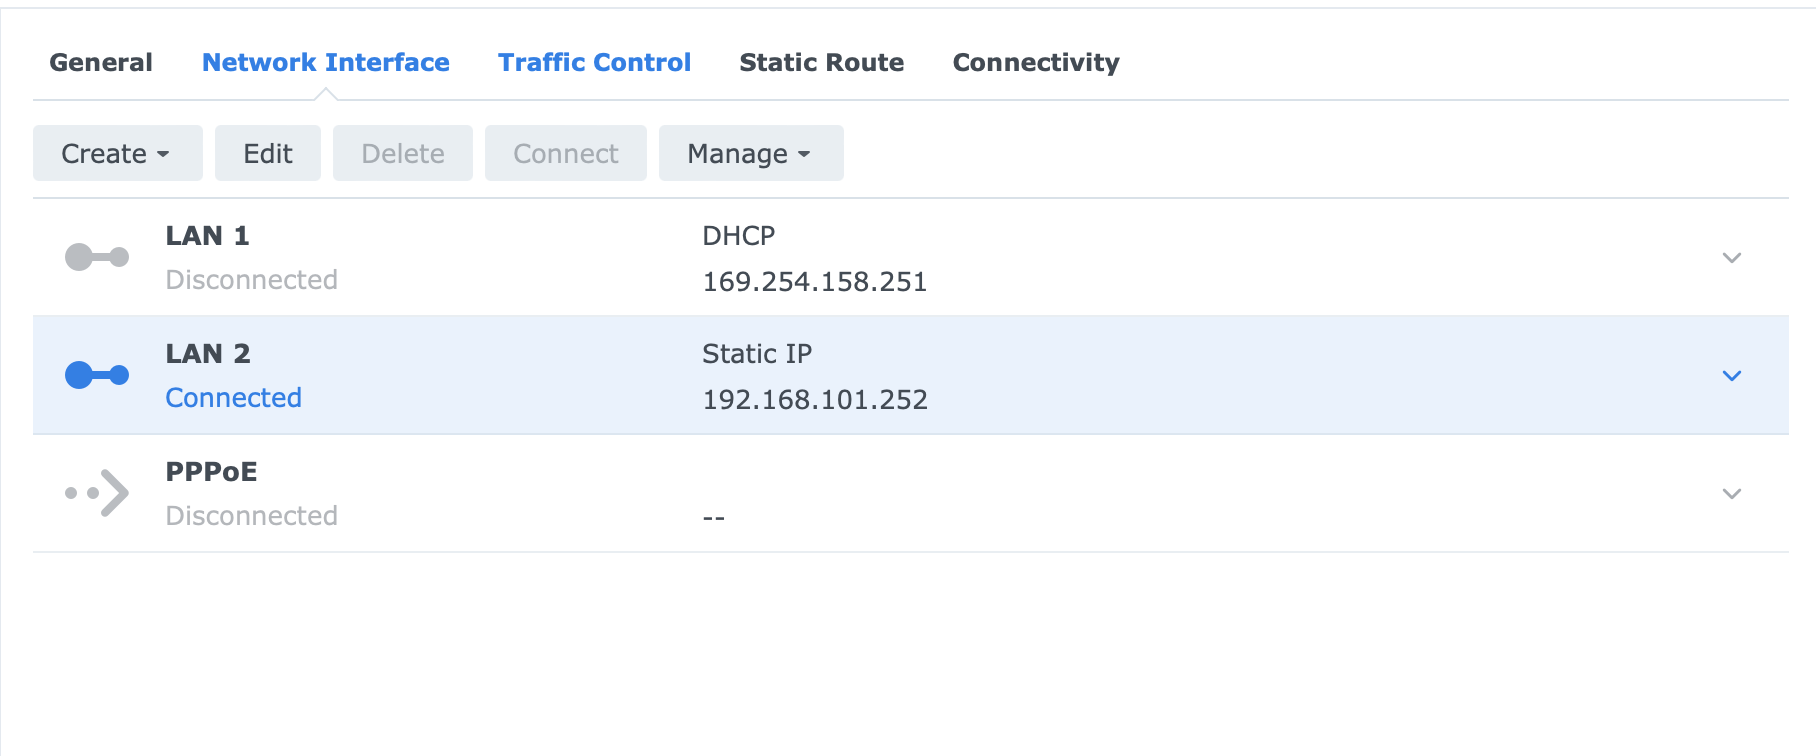
Set Static IP Address:
- Go to Control Panel > Network > Network Interface.
- Select your LAN connection or both if you have connected both Ethernet ports for redundancy.
- Click on Edit and set a static IP address within your subnet (e.g.,
192.168.101.252).

3. Configure DHCP Server on Synology NAS
-
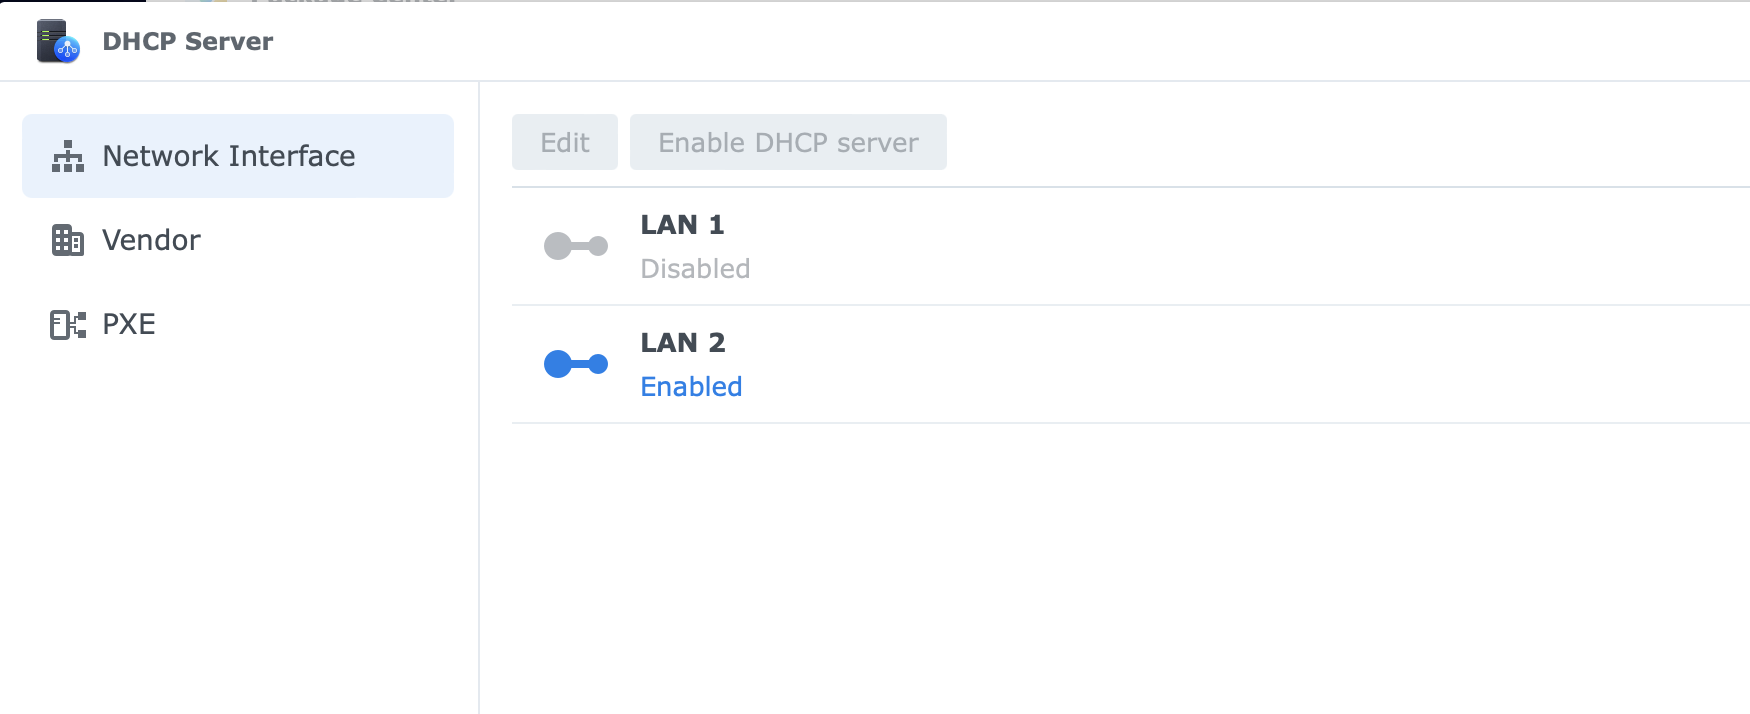
Open DHCP Server Application:
- After installation, open the DHCP Server application from the main menu.
-
Enable DHCP Server:
- Go to the DHCP Server application and enable the server.
- Set the Primary DNS and Secondary DNS (e.g.,
8.8.8.8).
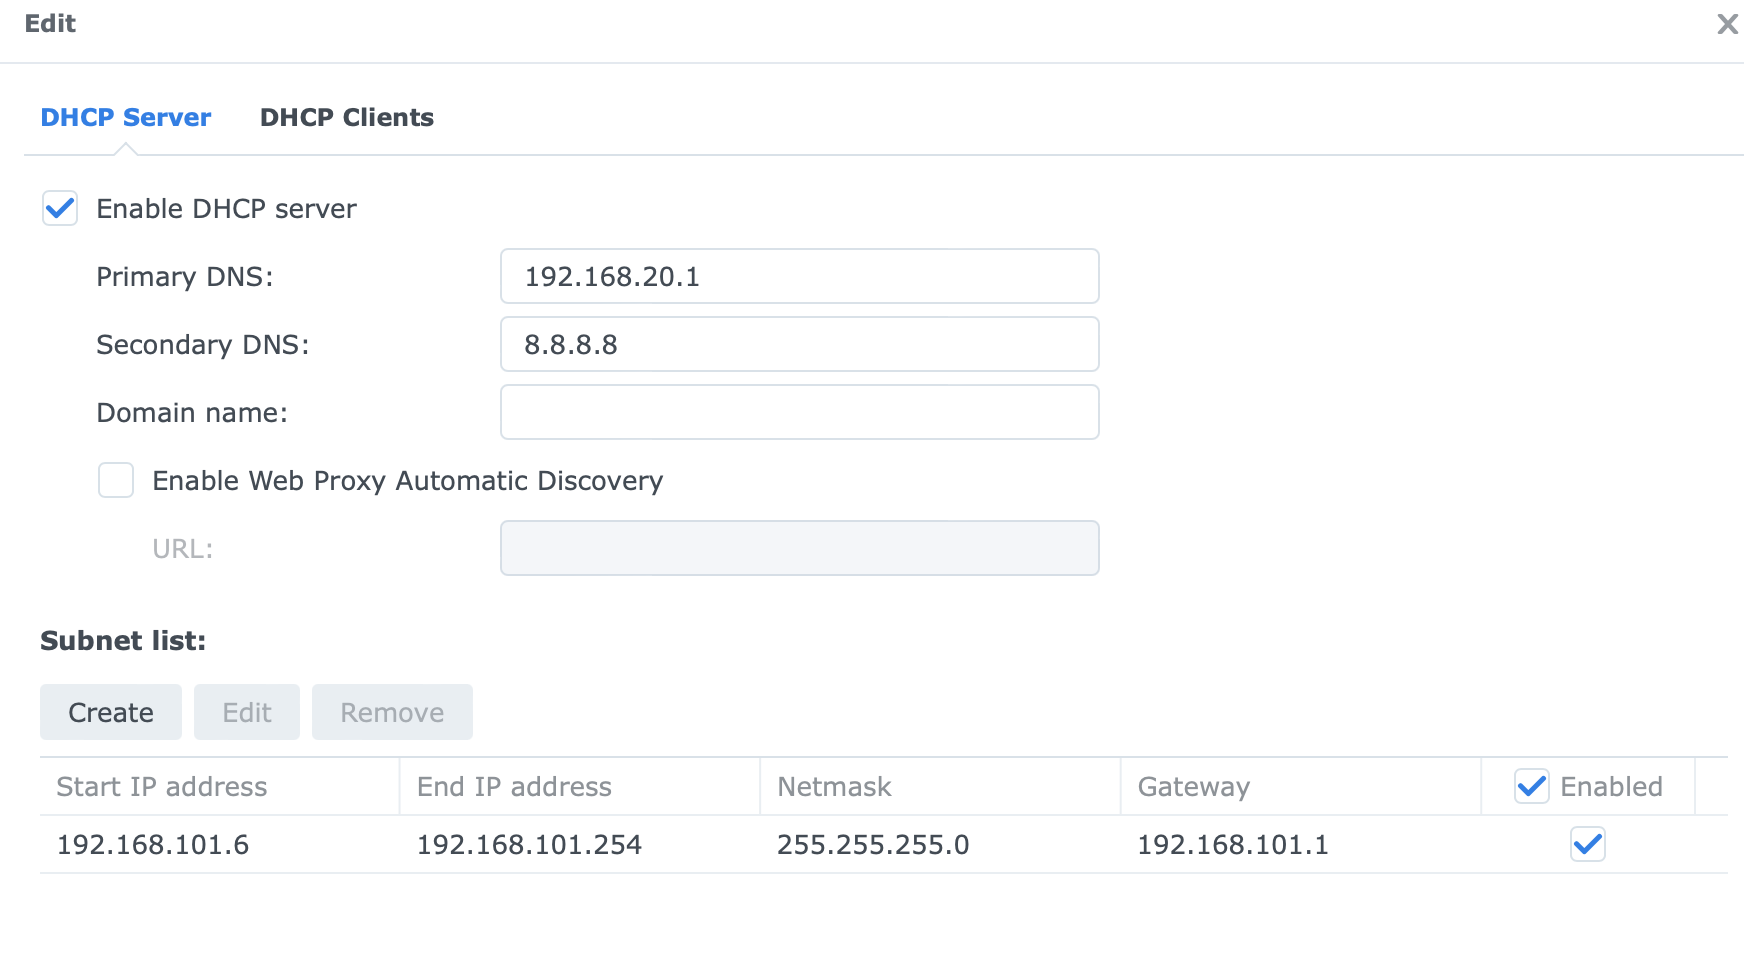
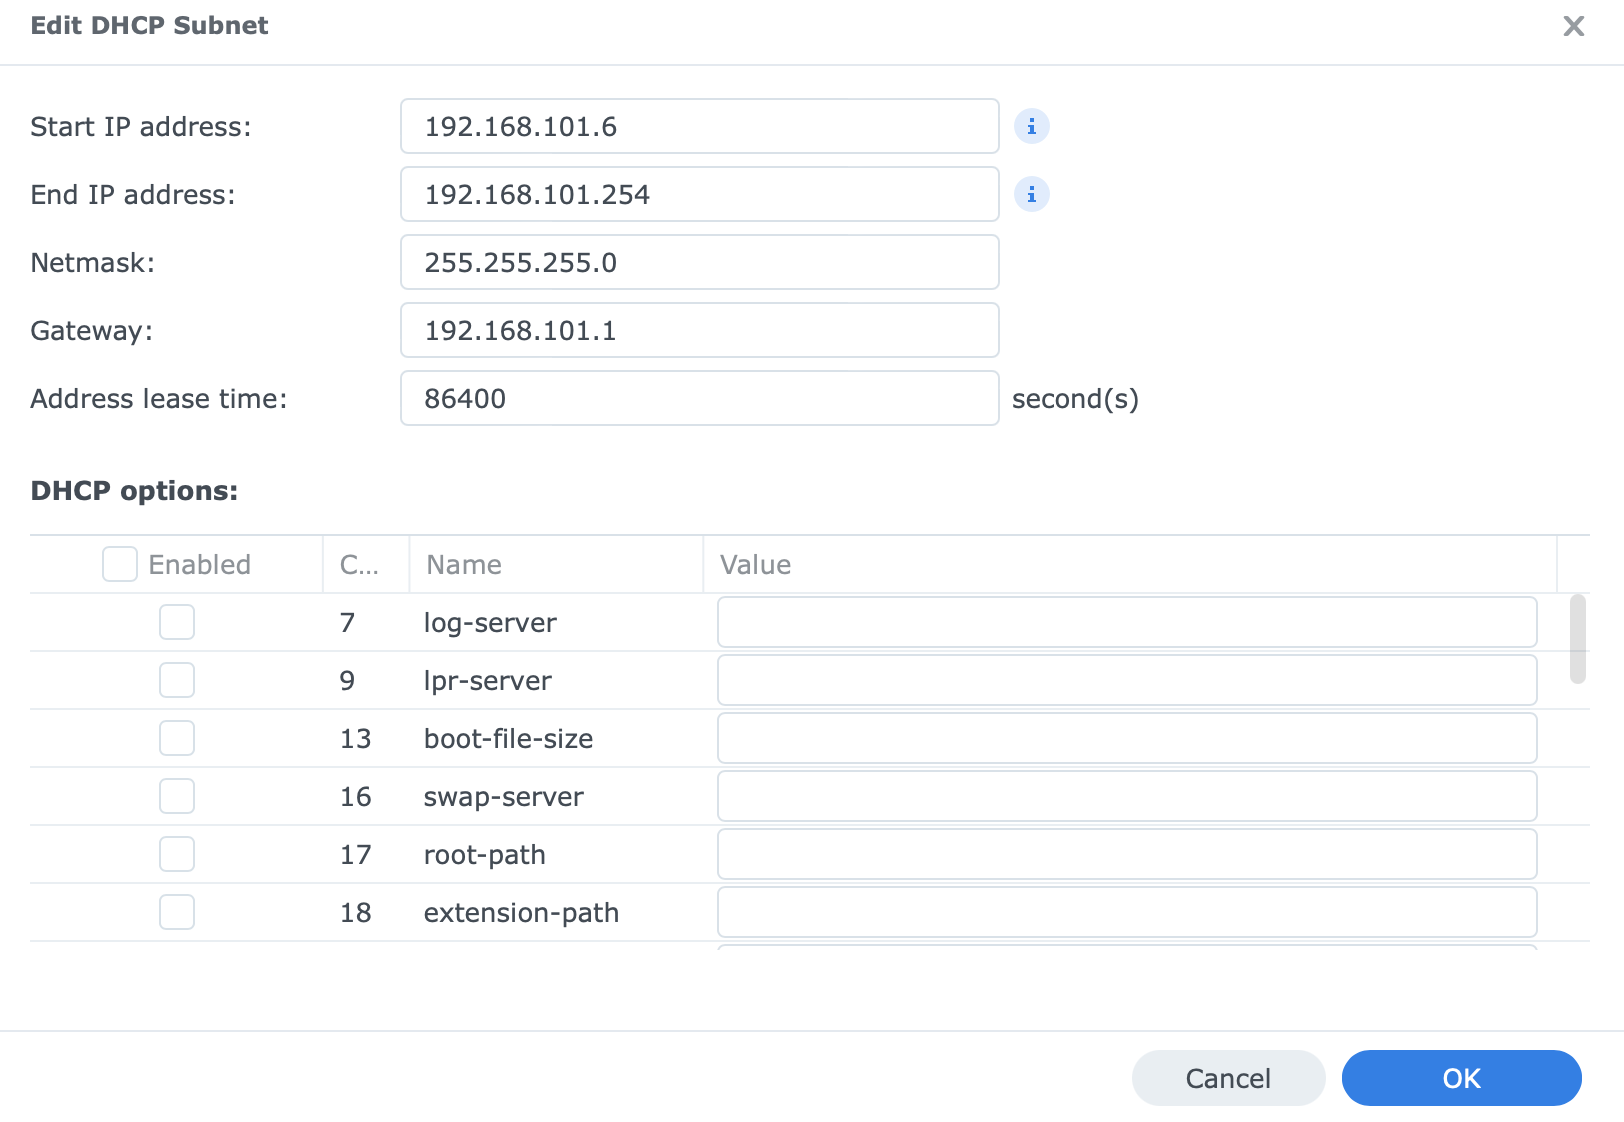
- Create Subnet List:
- Add a new subnet with the following details:
- Network Interface: Select the interface connected to VLAN101.
- Subnet:
192.168.101.0/24. - Start IP:
192.168.101.100. - End IP:
192.168.101.200. - Subnet Mask:
255.255.255.0. - Gateway:
192.168.101.1.
- Add a new subnet with the following details:
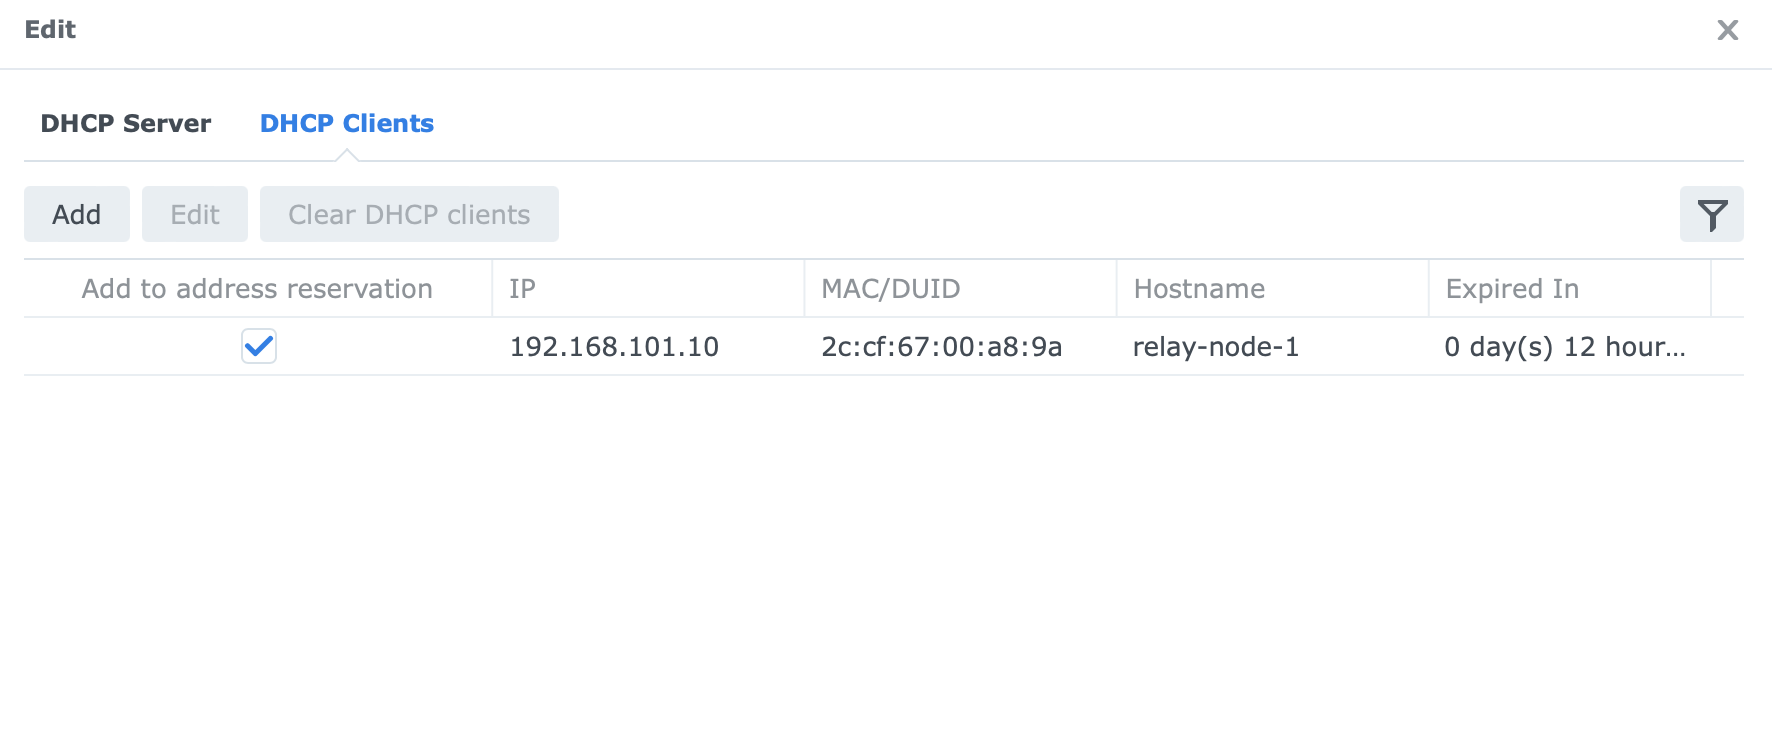
4. Connect and Verify Raspberry Pi
-
Connect Raspberry Pi:
- Plug your Raspberry Pi into Port 2 of your UDM SE.
-
Check DHCP Client Logs:
- On your Synology NAS, go to the DHCP Server application.
- Check the Logs table.
- You should see the Raspberry Pi listed as a new DHCP client with an IP address assigned from the
192.168.101.xrange.
Conclusion
Setting up a DHCP server on your Synology NAS within a UDM SE subnet is a straightforward process that offers robust network management capabilities. By following these steps, you can ensure your devices get IP addresses dynamically while maintaining control over your network configuration. If you encounter any issues, ensure all settings are correctly applied and consult the Synology and UniFi documentation for further troubleshooting.
Happy networking!